Tuesday, May 10, 2016

Hard(l)y Done... Lawless Hardy 2.0 - Face Update 2

And here we go again.

Almost another year.

I'm doing a great job at sticking to a blog post once a year...

As much as I would like to post every so often, I am compelled to keep tinkering behind the curtain until my work is all done. However, I think it is unfair to keep my progress to myself and I am certain that sharing it could benefit others in someway and be helpful to those in the process of working on something similar.

Here are a few screenshots of Tom Hardy in his latest digital state...


I never clearly stated one of the main purposes of this project. It is an ongoing project to track my progress in achieving a hyper realistic computer-generated human being - A goal I hope to accomplish. So this is practically a milestone project, if you will.

Tom Hardy is probably the best candidate for this since he is an actor who is so well photographed and filmed. It is also a plus that I am an immense fan of him, his acting, and his films and that he is a charming fellow which makes staring at his face for hours on end to sculpt and replicate the details all the more enjoyable! (Sorry if that sounds creepy. Welcome to character likeness art!)

Throughout this project, I expect to gain an understanding of how to accurately replicate real world objects and people digitally. I hope to then be able to create fantastical photorealistic characters and environments of my own and ultimately surpass the uncanny valley to reach that sought out level of true realism... which has impressively already been achieved by artists, movies, and commercials. Thankfully, there are constant technical leaps and achievements happening in the world of visual effects and computer graphics hardware and software to make that goal more attainable than ever. With that said, this project has a long way to go before it reaches its end, but until then, it's one great big work in progress until I get there.

Thanks for reading! Please comment if you have any questions. As this was more of a general update, I might possibly do a more in-depth breakdown in the near future.


-Natalie

Saturday, August 8, 2015

Lawless Hardy 2.0 - Update 1

A BIG Hello to you!

It has been a while... 

Actually, it has been more than a year since my last post.

To get this up and running again, I thought I would start by sharing a few semi-old and fairly new work-in-progress screenshots of my current personal project. I am updating and redoing 90% of a Tom Hardy model I created for my character modeling demo reel while at Full Sail University. I am currently revising and sculpting the head in Zbrush. Will move on to 3D software, Maya later on where I will pick up on the rest of the body model that I made already.


"LOOK MA, NO HANDS!"

I often refer back to these stills from the movie, Lawless for art direction. After all, this is a likeness, not just of Tom Hardy, but of the particular Forrest Bondurant character he portrayed in the film.

 More progress on the sculpt and cleaning up the paint job. Nothing is final at this point. Just playing around with the colors, adding in pore detail, making face tweaks, and rendering out different lighting situations-- Having fun!


Highest resolution models compare: New (left),Old (right)


For those who have not pursued a likeness project, you need to gather a bunch of reference of the person you are trying to replicate. This helps make things easier down the line. 
Using a profile photo, I try to match up silhouettes and shapes in Zbrush's Spotlight.
Most recently through spotlight, I lined up and painted a nice hi-res photo right onto the sculpture. Sort of like shrink wrapping it to the surface. And it lined up almost PERFECTLY!
However, it is still going to require a lot of tweaking, but it's another good base texture to start with.

In the image below, it is apparent to see the impact a texture has on a model.
Same model- different texture.


That is it for now! Thanks for reading!


Thursday, May 15, 2014

Fauntastical Creature Workflow


Took a while to get this post together, but it's finally here. Thank you for your patience if you've been waiting.

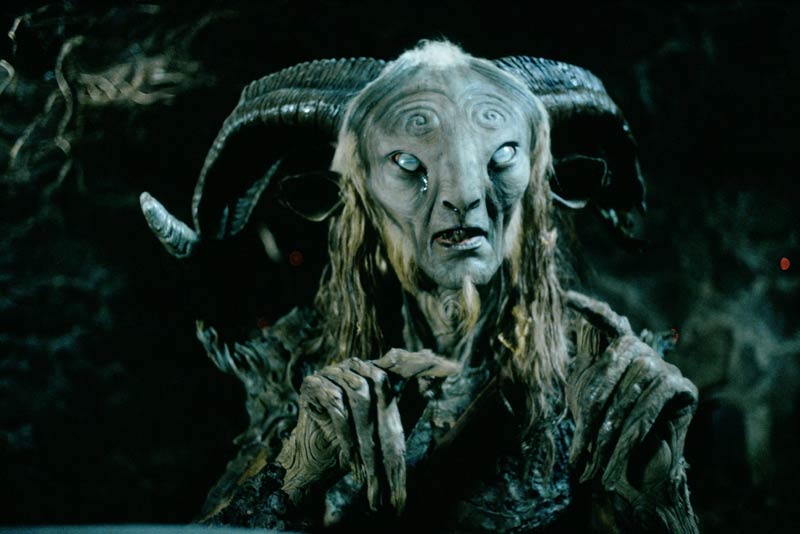
The faun is a character I came up with while I was sculpting in Zbrush to learn more techniques and workflows in the creature concept pipeline. A class I took from the Gnomon Master Classes also inspired this quick project. I had no idea what I wanted to make, I just knew I wanted to focus on making a bust (head to shoulders) of a creature. Pretty soon at one point, it started to go in a certain direction where it was starting to look more like a cat or a deer. Then I wanted horns. So it eventually turned into a faun!


Gathering reference of goats. I also looked up the faun character from Pan's Labyrinth and other artists' interpretations for inspiration.


Gathering more reference of skin patterns for painting the skin.
I painted the skin with Polypaint.

And more reference gathering for the horns.

Testing out the skin texture with different materials. I liked this one too because I was able to really see the surface detail. 
Eye reference gathering. And always SAVE your work!

Masking for posing. Learned this technique from Neville Page's Master Class.
When posing, I used layers so that way I could turn off the pose if and when I needed to. I could also revert back to the default pose instead of Undoing it. When masking, it helps to be on your lowest Subdivision because you can get a smoother transition at the bend points, then upresing after the posing. I didn't have my lowest subdiv any more so I had to play with the mask a bit more to get a nice falloff in the neck area where I was rotating the head. I really wanted to be picky with this because I didn't want to have to clean up the neck area later. I mean, have you ever seen someone turn their head to the right to sport a jagged piece of their neck jutting out? No. Yeah, I didn't want that.

Test pose!
 So I did all that masking work when in the end I went with a pose that was very subtle. Just something that took it out of digital symmetry worked for me.
Testing the lighting.


Rendered out numerous amounts of passes to have more control when I later composite them together in Photoshop.


I built upon layers and layers to achieve an intricate pattern for the eye since it was just going to be driven by the colors only and no sculpted detail.


Zbrush Timelapse


The Making of the Faun - https://www.youtube.com/watch?v=BNv-wkbW1H8&list=UULWlWRytzPTq-hye2SqKDZw


It's possible that I will add more to this post in the future.

Monday, January 27, 2014

Practice iPad Digital Paintings

I'm learning more how to handle drawing on my iPad because being as forgetful as I've been, I packed my Wacom tablet and sketchbook in one of the moving boxes for my move to New York without thinking that they wouldn't be unpacked until I have a place to move them into. But while staying at a hotel apartment hunting, I've been working on my digital skills and taking advantage of the absence of my usual tools. Of course I could buy another sketchbook, use notebook paper, or draw with a mouse... but this is more fun! 

The clown face painting guy I did started out as a simple colored head study to apply techniques I learned from various art courses I took last year. It looked pretty boring just as a plain head, no hair, so I added in hair and vibrant colors to his face to explore different results I'd get with different blending modes. I also wanted to pay my respects to clowns...cause I love clowns :)
I present Clown Guy! or Why So Serious?
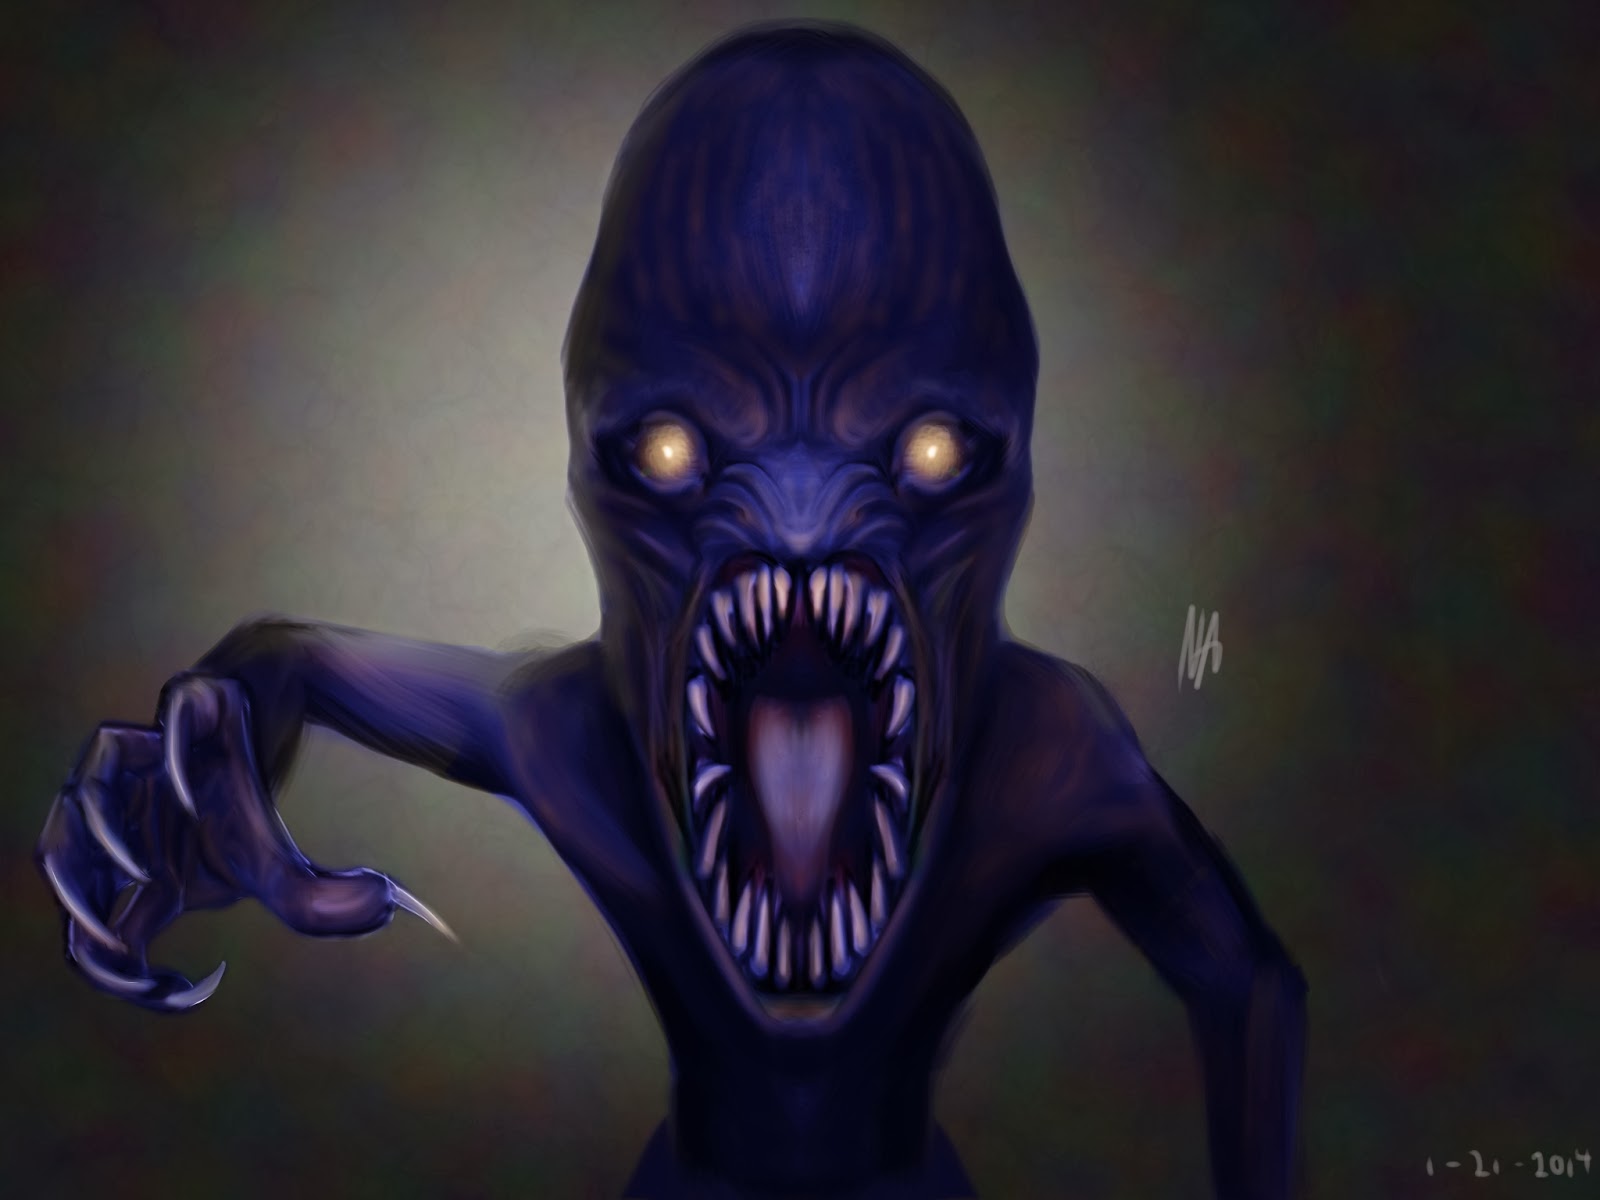
I saw a hella creepy creature art piece done by Ian Joyner on CGHUB and it gave me inspiration to do my own glowing eyed creepy alien critter which is also my very first post on CGHUB. Wooh!


 New creature concept inspired by Syfy's Face Off's Cosmic Conspiracy spotlight challenge. The challenge was to create an alien creature that reflected a certain decoded planetary distress signal.

Polluted and Toxic Environment sounded interesting. I wrote down a list of brainstorming terms that I wanted to show in my concept. Without taking the "Low hanging fruit" (a phrase I learned on the show), which might have been to go toxic green in my thoughts, I looked up pictures depicting real toxic and oil spills to get other ideas. Orange brown was a color that showed up a lot along with black-ish brown for oil spills. 

There is another historical event that I referenced from and that was Agent Orange from the Vietnam War between 1962 and 1971. It was claimed to be a pesticide to be sprayed over the jungles to get rid of unwanted plants and insects, but a contaminated batch ended up doing more damage than intended to the soldiers and residents living in the area causing deaths and children born with birth defects. Agent Orange still affects lives today with the future generations also becoming victims. Vietnam Veterans have dealt and are dealing with the affects as well. It's a really brazen event that shows what toxins can do. This key point drove most of my design choices from here on out. Sad images of victims and the environment helped me see how this creature would be affected if it were living in a toxic environment. A lot of it was really depressing to see, but I wanted to ground my creature in reality as much as I could without solely going off of my imagination.

Most of what I referenced: Gas masks/ half masked respirators, chemical burns, peeling skin, forest fires, oil spills, Agent Orange, pollution, toxins, pollutants, animals dealing with oil spills, polluted environments.

All these were done using the ArtStudio App by Lucky Clan for iPad and a stylus. Please feel free to ask me any questions. Hope you enjoyed this post and thanks for reading!

Friday, January 17, 2014

First Post of 2014!

Boy, time flies! The last half of 2013 after I graduated in May from Full Sail University was chaotic and eventful to say the least. The studying continued as I was really deciding the next territory I wanted to venture in. So since I didn't get to update earlier last year, I decided to cram in all my adventures into one blog post...

A month after I graduated from Full Sail University, I went back for an internship to assist the online students in the 3D Foundations course for the Computer Animation degree program. It was wonderful to see students with the same immense passion as I had, anxious to finally learn what they've always dreamed of learning -to bring their imagination to life.

To keep with professionalism, I updated my resume frequently and I got my business cards that I designed while in Full Sail printed by Primo Cards.

During the same time as my Full Sail internship, I also had the good fortune of interning with Legal Demonstrative Exhibits as a 3D Artist, where I was asked to model an anatomical human male skeleton to be used in medical illustrations and animations for legal cases. I became more aware of the true importance of understanding anatomy especially pertaining to the medical field. Renders can be seen on my website.

After the internships ended, I made myself available to volunteer freelance work for a bit.

In September, I took a trip with my dad to the other side of the country, Los Angeles, California! There we attended the Gnomon Workshop Live Event. For two days, ten industry artists talked about their work and experiences. The demos and presentations ranged from technical to artistic with all of them being insightful. I had the pleasure of meeting and networking with talented artists, students, and experienced industry professionals (That's where those business cards come in handy).

It was expensive, but it was worth it. If not going would have meant at the expense of knowledge, inspiration, not to mention the revitalized energy, motivation, and focus I experienced... it was definitely worth going.

What's crazy about it all is that I grew up with the movies and games that these artists presenting helped in creating and realizing. It was such a surreal experience for me and yet everyone was so casual and professional, which was even more surprising. I grew up with the crazed fan conventions and it was nothing like that. Everyone treated each other like professional artists. It was nice.
Sketch collage of the 2013 Gnomon Workshop
Live Event presenters: Because artists rarely get
drawings done of them and I love drawing faces!
Finally got to meet Neville Page, a brilliant creature and concept designer who has worked on Avatar, Cloverfield, Star Trek, Prometheus, and much more. He is a big inspiration and one of the reasons why I wanted to pursue a career in the industry. To see a design you create then to become full reality in a movie is a dream of mine and I didn't realize that until I saw Cloverfield. Another inspiration was Peter Konig, a concept artist for film and game, whose resume jumps back to Jurassic Park and Starship Troopers. Izzy Medrano worked on the concepts for Tony Hawk: American Wasteland, and God of War III! And the list goes on and on.. Of course, every single presenting artist has inspired me to this point. Seriously look their portfolios up and your mind will be blown!

While the artists presented their demos, I took a plethora of notes and managed to sketch each one of them (in the dimly lit room). Here are the sketches I did with a few color corrections in Photoshop.

All the presenters were very inspirational with their work and stories and made me want to work even harder on my art skills when I got back home.

To illustrate that, while I was on a camping trip, since it just happened to be the first of the month, it was perfect
timing, and for multiple reasons, I decided to take advantage and start a personal creature challenge exercise where I would make up a creature every day for 30 days in any medium and post on social sites. I didn't concern myself over if they were completely thought out or unique, but just to have the excuse to practice everyday, seeing where it would take me, how much I could expand on my creative ideas and imagination, and what I could get inspired with especially with being in the outdoors for half the month!

Redid my website, changing my title from Character Modeler to Character and Creature Artist. I love every step of the visual effects process and as of yet to find something I absolutely dislike doing, but my biggest passion for the longest has been the character and creature development aspect.

Towards the end of the year, I enrolled in the online Gnomon Master Classes where I networked, learned more on visual effects, and got inspired some more! I definitely recommend it if you have the funds. It's a terrific learning experience.

Last but not least to start the new year with a bang, I got added to the Avalanche Studios team in Manhattan, New York! The thought of moving and starting my first major gig in the game industry is a thrilling feeling, but I am ready as I'll ever be and I'm looking forward to starting my new career.

I hope that I can post more frequently this year, which is a new year's resolution of mine. Thank you for reading.

Monday, November 11, 2013

Updates About Updates

I have new things to tell and I haven't had much time recently to dedicate to keeping this blog up to date (as much as I want those things to be told). But I will tell you, there is a lot to be said! I am currently working on a new website with a brand new art direction and updated portfolio, which should be up and running by the start of next year. This is an update about more updates to come. So keep your eyes peeled and thanks for reading!